Friday, December 12, 2014

Presentation

Members in Attendance: Stanislas Camin, Gerard Colome, Micah Menendez-Aponte


Today was the presentation of our project in front of our peers and Engineering Professors. While our project was not finished in the way that we wanted it to be presented, I think our description and minor demonstration did a sufficient job at showing what our project was about. I have attached a photo of our finished drum setup.

This will officially be our last post for this project.
The final product

Thursday, December 11, 2014

Solidworks Files

Attached to this post are all of the Solidworks files we used for this project as well as a 3D printed part for a mount we found on the Instructables website.


Arduino Code (Final)

The following code was drawn from the examples listed on the Instructables site mentioned earlier in the blog (http://www.instructables.com/id/Arduino-Controlled-Robotic-Drum/), with slight tweaks for compatibility with our project.

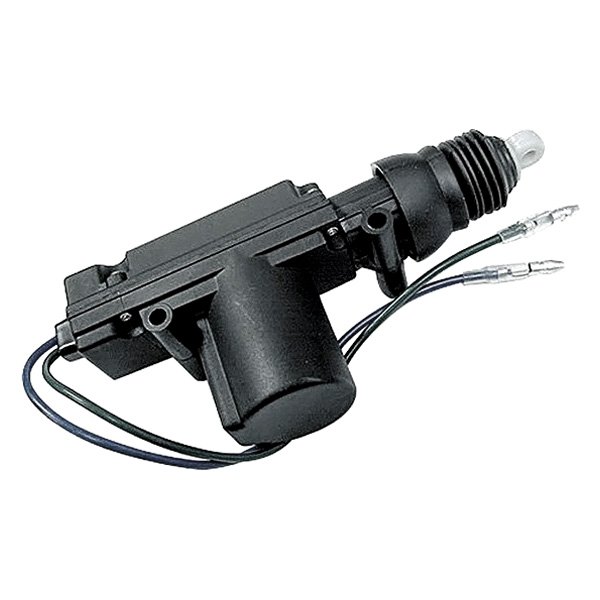
Unfortunately, because the motors we use are currently drawing more than three amps from the motor shield, they will not be able to function with it. For future reference, either a different type of motor shield must be used or motors that draw less current when operating from the same circuit.


int event = 0;

int strikelegnth = 80;

int incomingByte = 0;


void setup() {

  //establish motor direction toggle pins
  pinMode(12, OUTPUT); //CH A -- HIGH = forwards and LOW = backwards???
  pinMode(13, OUTPUT); //CH B -- HIGH = forwards and LOW = backwards???

  //establish motor brake pins
  pinMode(9, OUTPUT); //brake (disable) CH A
  pinMode(8, OUTPUT); //brake (disable) CH B

  digitalWrite(9, LOW);  //ENABLE CH A
  digitalWrite(8, LOW); //ENABLE CH B


  Serial.begin(57600);

 cli();//stop interrupts

  //set timer2 interrupt every 128us
  TCCR2A = 0;// set entire TCCR2A register to 0
  TCCR2B = 0;// same for TCCR2B
  TCNT2  = 0;//initialize counter value to 0
  // set compare match register for 7.8khz increments
  OCR2A = 255;// = (16*10^6) / (7812.5*8) - 1 (must be <256)
  // turn on CTC mode
  TCCR2A |= (1 << WGM21);
  // Set CS11 bit for 8 prescaler
  TCCR2B |= (1 << CS11);
  // enable timer compare interrupt
  TIMSK2 |= (1 << OCIE2A);

  sei();//allow interrupts

}

void loop() {

 if(event == 1){

   if (incomingByte == 135) {
       //start down
       digitalWrite(9, LOW); //Disengage the Brake for Channel A
       digitalWrite(12, LOW);   //Sets direction of CH A
       analogWrite(3, 255);   //Moves CH A
     
       //strike time
       delay(strikelegnth);
     
       //stop
       digitalWrite(9, HIGH); //Engage the Brake for Channel A
       delay(10);
     
       //go back
       digitalWrite(9, LOW); //Disengage the Brake for Channel A
       digitalWrite(12, HIGH);   //Sets direction of CH A
       analogWrite(3, 255);   //Moves CH A
     
       //recoil time
       delay(40);  
     
       //stop
       digitalWrite(9, HIGH); //Engage the Brake for Channel A
     
       event = 0;
   }
 
 
   if (incomingByte == 136) {
       //start down
       digitalWrite(8, LOW); //Disengage the Brake for Channel A
       digitalWrite(13, LOW);   //Sets direction of CH A
       analogWrite(11, 255);   //Moves CH A
     
       //strike time
       delay(strikelegnth);
     
       //stop
       digitalWrite(8, HIGH); //Engage the Brake for Channel A
       delay(10);
     
       //go back
       digitalWrite(8, LOW); //Disengage the Brake for Channel A
       digitalWrite(13, HIGH);   //Sets direction of CH A
       analogWrite(11, 255);   //Moves CH A
     
       //recoil time
       delay(40);  
     
       //stop
       digitalWrite(8, HIGH); //Engage the Brake for Channel A
     
       event = 0;
   }
 
   if (incomingByte == 192) {
       //start down
       digitalWrite(9, LOW); //Disengage the Brake for Channel A
       digitalWrite(12, LOW);   //Sets direction of CH A
       analogWrite(3, 255);   //Moves CH A
     
       digitalWrite(8, LOW); //Disengage the Brake for Channel A
       digitalWrite(13, LOW);   //Sets direction of CH A
       analogWrite(11, 255);   //Moves CH A
     
       //strike time
       delay(strikelegnth);
     
       //stop
       digitalWrite(8, HIGH); //Engage the Brake for Channel A
       digitalWrite(9, HIGH); //Engage the Brake for Channel A
       delay(10);
     
       //go back
       digitalWrite(9, LOW); //Disengage the Brake for Channel A
       digitalWrite(12, HIGH);   //Sets direction of CH A
       analogWrite(3, 255);   //Moves CH A
     
       digitalWrite(8, LOW); //Disengage the Brake for Channel A
       digitalWrite(13, HIGH);   //Sets direction of CH A
       analogWrite(11, 255);   //Moves CH A
     
       //recoil time
       delay(40);  
     
       //stop
       digitalWrite(8, HIGH); //Engage the Brake for Channel A
       digitalWrite(9, HIGH); //Engage the Brake for Channel A
     
       event = 0;
   }
 }
}


ISR(TIMER2_COMPA_vect) {
  do{
    if (Serial.available()){
      incomingByte = Serial.read();
      event = 1;
    }//end if serial available
  }//end do
 while (Serial.available() > 8);
}  

Meeting 5: 12/11/14

Final Assembling

Members in attendance: Stanislas Camin, Micah Menendez-Aponte

Details: 2.5 hour meeting to finish up work on our project and figure out how to code it


Stan and Micah met for an extended period of time today to finish up work on the project. Due to bad communication (we're blaming technology this time), Gerard was not present. Stan had finished the second mount for the motor and Micah was beginning to make progress with the coding. However, neither of us brought tools to attach the motors to the drum.

Stan began by attaching the drum sticks to the motors and mounts while Micah did more work on the code. After testing the wires with the leads we had, we then decided it would be a better idea to solder thinner wires to the motor wires. Micah did the soldering while Stan started to work on some code. A brief test done on the power supply node on the motor shield confirmed that the wires were functioning as well as the motors.

Coding this device has proven to be harder than originally thought since the motors now require manual data entry as well as specific commands to deal with their polar function (putting power in makes it extend, but contractions require power and different commands). There is also some concern that the motors, both running out of the same motor shield, may exceed the Three Amp max current when working together. If this is the case, then this would be a major complication for us, especially this late in building, we'll have to do more tests and research to find out.

-Stan will get our mounting material.
-Gerard will continue work on the deliverables.
-Micah will finish coding and final preparations on the moving components.

Wednesday, December 10, 2014

Meeting 4: 12/10/14

Final Assembling...?

Members in attendance: Stanislas Camin, Gerard Colome, Micah Menendez-Aponte

Details: 30 minute group meeting to assess where we are so far and talk about final assembly

The motor on its new mount

The three of us met to see where we are so far. I brought the drum and its accessories and Stan brought the motor on its new mount. Everything seems to be coming together fine now but it became clear that were still lacking a few components. 

First off, we need to make a second mount for the second motor; then get something to mount them to the drum with, either an adhesive or a hose clamp. There have also been some problems with the code for this project. While we were originally planning to use a software designed for this purpose, it has come to our attention that that option is out and that we will have to write our own code. We agreed that it was best we get together tomorrow to get the finishing touches out after working on our separate tasks.

-Stan will build the second mount.
-Gerard will start work our presentation material.
-Micah will work out some code once again.
What we have so far

Monday, December 8, 2014

Procuring Parts

Motors

Stan and Micah got together and went to Jack's Used Auto Parts in Billerica. This time around we had more help from an experienced mechanic and a much wider pool of cars to get parts from. From what we figured out, the kind of lock actuator motor we are looking for will be in an older model of truck, probably a Ford or Chevy. 

'88 Chevy Blazer Similar to the one we found
After looking around for a couple of hours, we found an '88 Chevy Blazer with intact doors and mechanisms to match. A brief check on the locks found that they had the motors we were looking for and would have to be pried out of the riveted doors. Once they were out, the motors were still attached to their mounts which will definitely help later when building the final product.

This was the last part we needed, our project is now ready for assembly.


Lock actuator motor still in its door
-Micah will take one motor home to start working on code for it.
-Stan will take the other motor to build a housing for it.

Friday, December 5, 2014

Procuring Parts

Motors & Snare Drum

Micah went back to Kazanjian Used Auto Parts again today to see what he could find in the scrap yard. After opening (tearing open) several doors it became clear that they did not have the part we were looking for. After checking the more modern cars and vans, Micah left and went back home.

Snare drum with stand
Later Micah met with his colleagues in the music department and was able to secure one marching snare in good condition, a static drum stand, and a pair of used snare sticks. We are just waiting on the lock actuator motors now before we can start putting this project together.

Wednesday, December 3, 2014

Procuring Parts

Motor Shield & Motors

Micah met quickly with Professor Sullivan and was able to get a motor shield for the project. After that he met with Stan and drove to Kazanjian Used Auto Parts here in Lowell to find lock actuator motors. These motors in particular will act as pistons and fulcrums for a proper sticking motion.

Door lock actuator motor
The workers at the shop said they could help us but also said they had closed the yard for the day. We will have to come back during the day to try again.

Monday, December 1, 2014

Procuring Parts

Snare Drum

Micah met with two directors of the music department on campus to discuss borrowing a snare drum. As of right now the chances of acquiring a marching snare for this project are good. The chances of getting three, slightly less so. Will hear more by the end of the week once our case has been reviewed.

Tuesday, November 25, 2014

Materials List (as of 11/25/14)

Materials List (for snare line)
Snare Drums (x3)
Drum Sticks (x6)
Car door lock actuator motor (x6)
Arduino Uno (x3)
Arduino Motor Shield (x3)
Plywood sheets
Hose clamps (or any type of mounting device)
Wire spools
USB hub (?)
Screws
Bolts & Corresponding Nuts
Spacers

Meeting 3: 11/25/14

Project Overview & Listing Materials

Member in attendance: Stanislas Camin, Gerard Colome, Micah Menendez-Aponte

Details: 1 hour group meeting to discuss specifications for our project, brainstorm designs, and compile a materials list to take home over the break


After an extended period of minimal communication, the team got back together to discuss how we would go about this project with what resources we had at our disposal. It came to our attention that with our current funds, designing and building a full drum kit was out of the question. However, we opted to fall back on the Winter Percussion idea and are preparing to set up a marching snare (or snare line) instead.

Initial brainstorm/sketch for prototype.
Based on this project, we have also compiled a list of materials that will be required to produce this end product (post pending). We will bring this list with us over the break and ideally return to school refreshed with as many parts as we could find.


-Micah will continue doing blog related tasks and start looking for parts at scrapyards.
-Stan and Gerard will start looking for parts by recycling what they can at home and buy parts from hardware stores when necessary.

Tuesday, November 4, 2014

Meeting 2: 11/4/14

Further Introductions and Team Photo

Members in attendance: Stanislas Camin, Gerard Colome, Micah Menendez-Aponte

Details: 10 minute meeting in Fox Common to iron out details and take our team photo


Today the team met again in its entirety for the first time. We had been communicating earlier and have now decided to go ahead with the mechanized drum kit project. Our primary inspiration comes from the video linked here (https://www.youtube.com/watch?v=cHvxF7ze5EY), the idea being we will build something close to the drum kit featured here or put a twist on it and fully mechanize a drumline ensemble "a la Winter Percussion". In addition to the YouTube video, there is a project listed on Instructables linked here (http://www.instructables.com/id/Arduino-Controlled-Robotic-Drum/) that we will likely draw heavily from to help along during this project. The team seems pumped and ready to go, work on our idea should commence next week.
SMG Drum Co. is now open for business.

-Micah will be creating the blog and documenting the first two meetings.


Meeting 1: 11/3/14

Introductions and Brainstorming

Members in attendance: Stanislas Camin, Micah Menendez-Aponte

Details: 30 minute meeting in Ball 210 to brainstorm


Today most of the team met for the first time for introductions and to discuss the project (Gerard was preoccupied and unable to attend). We brainstormed team names as well as group projects and how we would go about fulfilling the requirements for them.

At the end of the meeting we were set on a team name, Team SMG, which is an acronym for our initials (Stan, Micah, Gerard). Though the project idea was still up in the air as can be seen here, we have a fair idea of what we wanted to do. Our favorites right now are a flamethrower to roast marshmallows for passing students, or a fully mechanized drum kit/line.


-Stan will be making the blog and documenting the first meeting.